
- Single smart outlet plug by Enbrighten picked up at the local auction return this week.
- Below captures my thought process and notes as I attempted to get this flashed over to ESPHome and Home Assistant. My initial thoughts about the device turned out to be wrong upon opening it up.
Device Info
FCC lookup
- Loking up the FCC ID online
- https://fcc.report/FCC-ID/QOB-WFD4103
Change of ID letter point to another FCC ID
![29109751b3d70c592f3a055c1cbae130.png]()
- https://fcc.report/FCC-ID/2AMV5-SK539-W-A
Internal Photos
- Internal photos found for the older FCC ID

- Looks like it’s a CB2S module
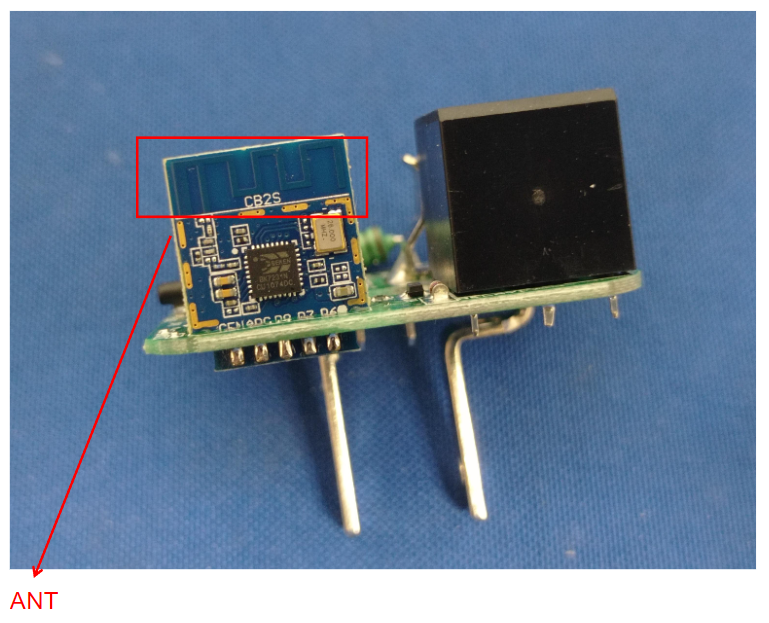
CB2S Module
- Pin diagram available online
- https://developer.tuya.com/en/docs/iot/cb2s-module-datasheet?id=Kafgfsa2aaypq
Wireless Exploits
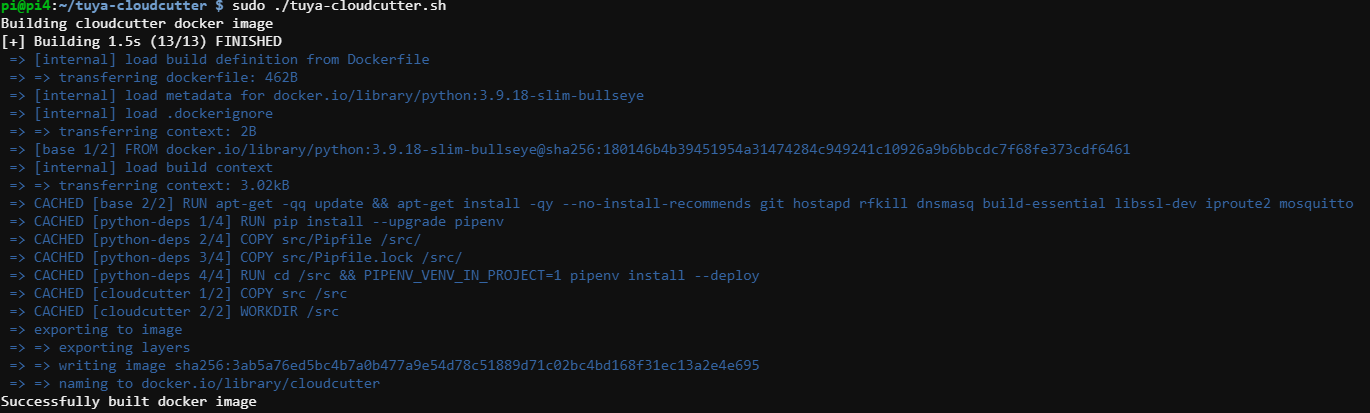
- Since this is a single plug and is not held together by screws and compression… I’m hoping the tuya-cloudcutter will work instead of having to potentially destroy and rip apart the plaster case.
Tuya-Cloudcutter
- https://github.com/tuya-cloudcutter/tuya-cloudcutter
- “This repository contains the toolchain to exploit a wireless vulnerability that can jailbreak some of the latest smart devices built with the bk7231 chipset under various brand names by Tuya. “
- run
sudo ./tuya-cloudcutter.shand let it build a fresh docker image
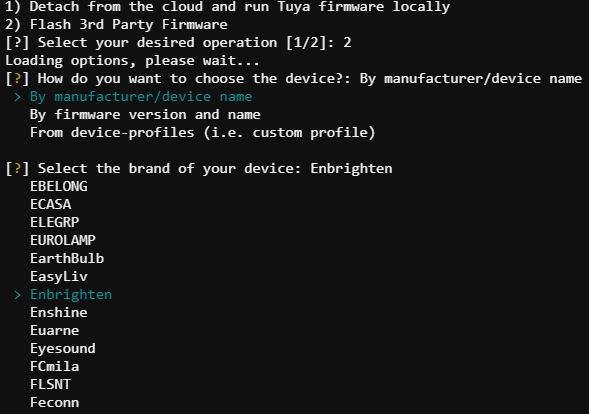
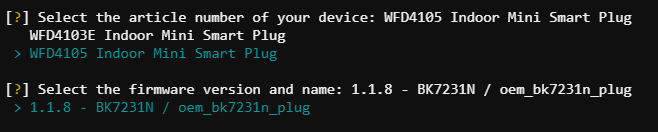
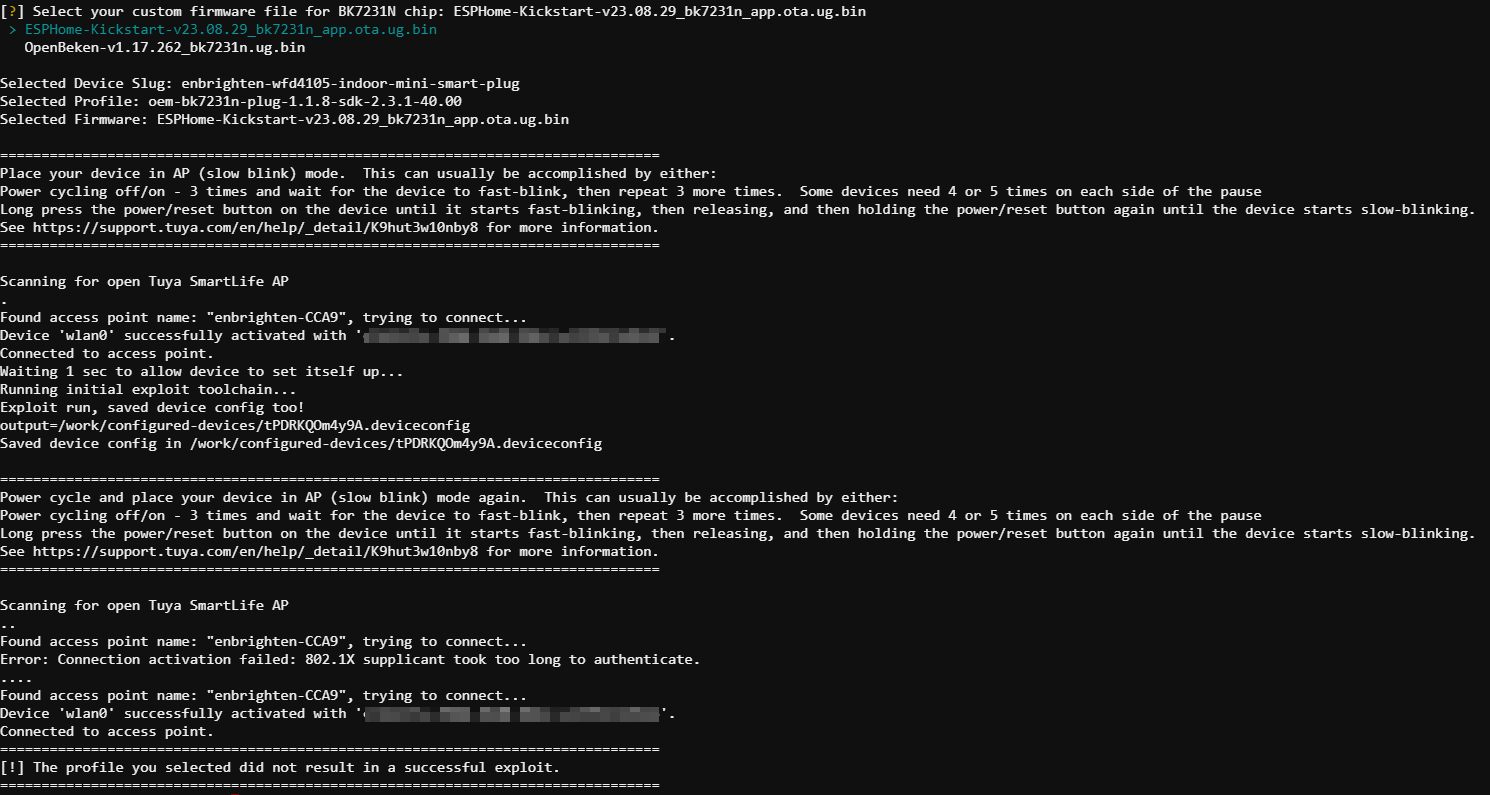
- no profile for the 4103, but a 4103E. Upon selecting however, shows a BK7321T firmware but if this is a CB2S module then it should be an “N”

- Looking at the other option it is a BK7231N firmware
Results
- Not succesful trying flash both profiles. Most likely these two other pre-built profiles have different keys or something that is different enough it wont autheticate and allow the re-write. Or I keep screwing up the last part powering back on the device and it exits running the script too soon. Guess it’s on to opening it up….
Teardown & Connections
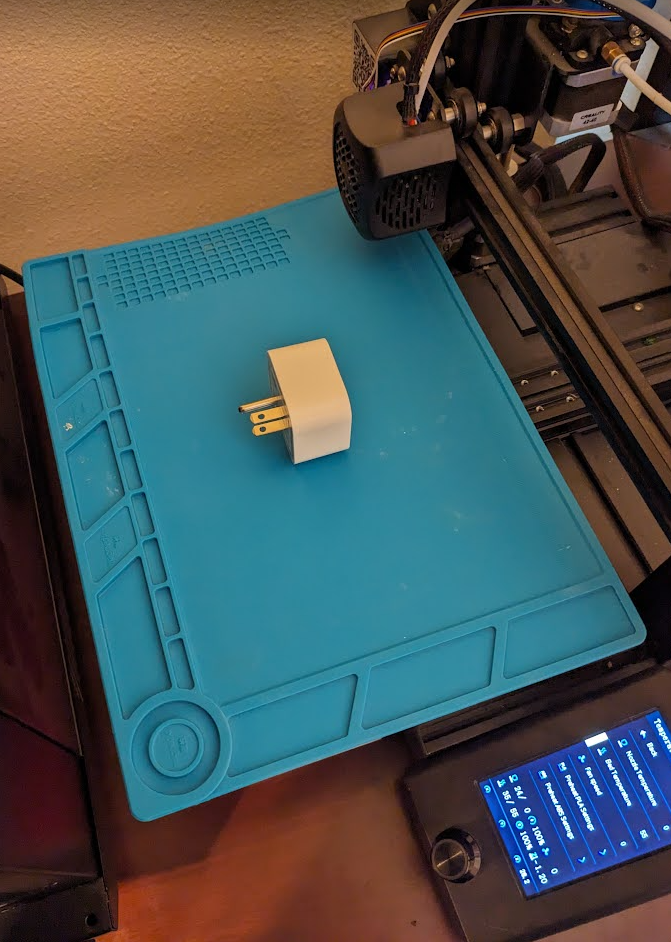
External Photos
Turned on the poor mans hot plate to try to heat and soften the glue before trying to separate the top and bottom parts of the plug.
![25849062d36a2df523bfac1822925ab2.png]()
Heat helped a little but still required a good bit of cutting through and prying up
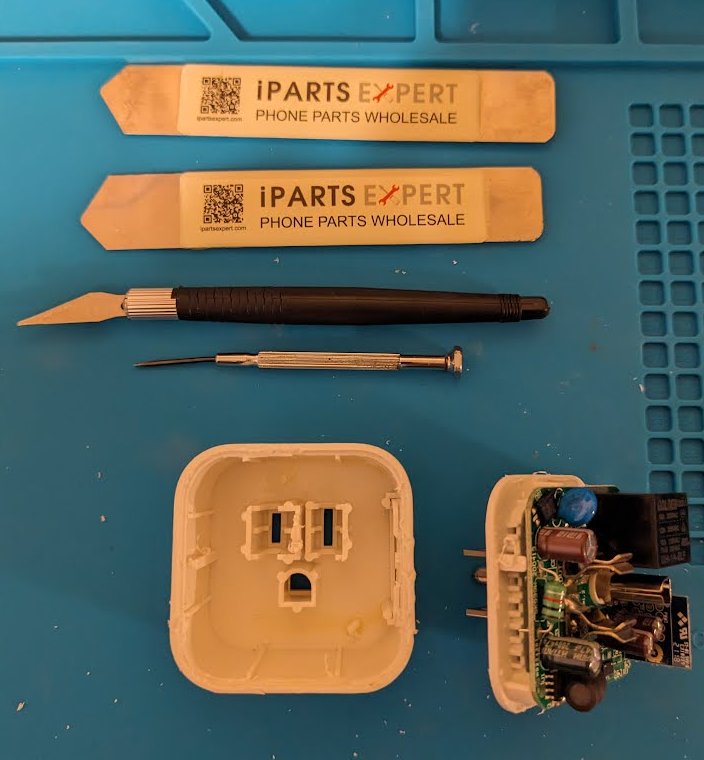
Internal Photos
- It’s a
WB2Snot aCB2Slike I was thinking from the FCC research…
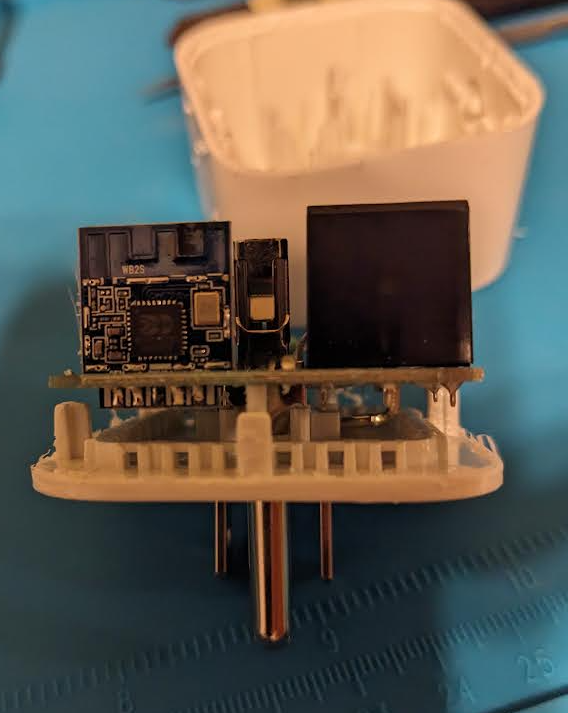
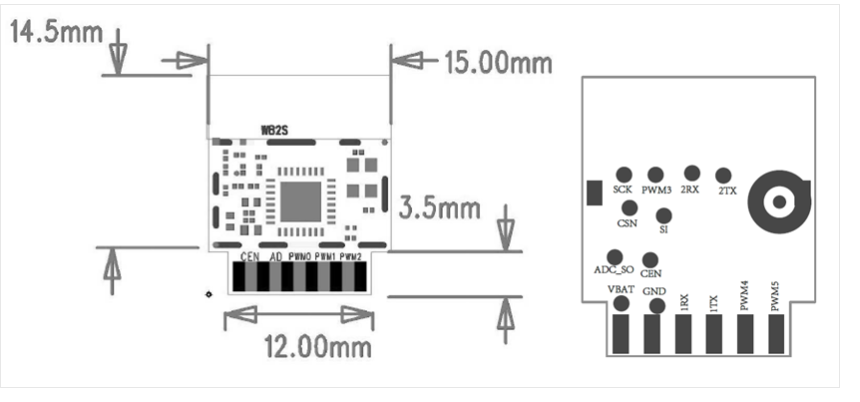
- WB2S pinout
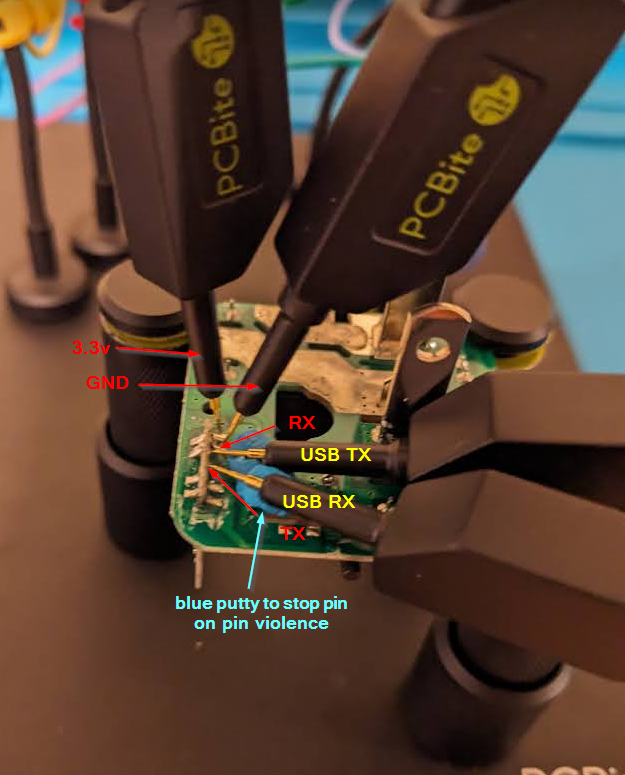
- Connecting it all up
Firmware Dump
- Serial to USB converter connected up to computer and ltchiptool was used to interact with the CB2S module.
- https://github.com/libretiny-eu/ltchiptool
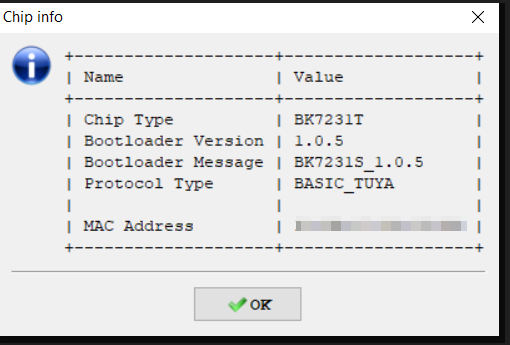
Chip Info
- Looking at the chip info
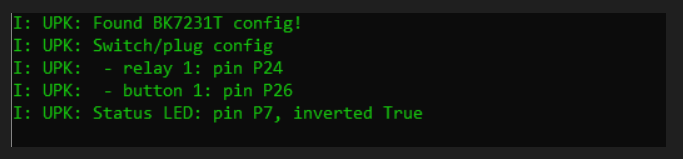
Read Flash
- Firmware saved and read back in to look at pin configuration
ESPHome
ESPHome Config
1
2
3
4
5
6
7
8
9
10
11
12
13
14
15
16
17
18
19
20
21
22
23
24
25
26
27
28
29
30
31
32
33
34
35
36
37
38
39
40
41
42
esphome:
  name: enbrighten-wfd4103-2
  friendly_name: enbrighten-wfd4103-2
bk72xx:
  board: generic-bk7231t-qfn32-tuya
logger:
web_server:
captive_portal:
mdns:
api:
ota:
wifi:
  ssid: !secret wifi_ssid2
  password: !secret wifi_password2
  fast_connect: true
  manual_ip:
    static_ip: 192.168.xx.xx
    gateway: 192.168.xx.1
    subnet: 255.255.255.0
text_sensor:
  - platform: libretiny
    version:
      name: LibreTiny Version
binary_sensor:
  - platform: gpio
    id: binary_switch_1
    pin:
      number: P26
      inverted: true
      mode: INPUT_PULLUP
    on_press:
      then:
        - switch.toggle: switch_1
switch:
  - platform: gpio
    id: switch_1
    name: Relay 1
    pin: P24
status_led:
  pin:
    number: P7
    inverted: true
- In Home Assistant and ESPHome, a new device is created matching the device name in the YAML. Device can be installed, downloaded and flashed using LTChiptool.
ESPHome Operation
- After flashing, the device was put back together and then plugged into an outlet. After a few seconds the device popped up on Home Assistant as a new Device.
- ESPHome dashboard showing information and relay operation
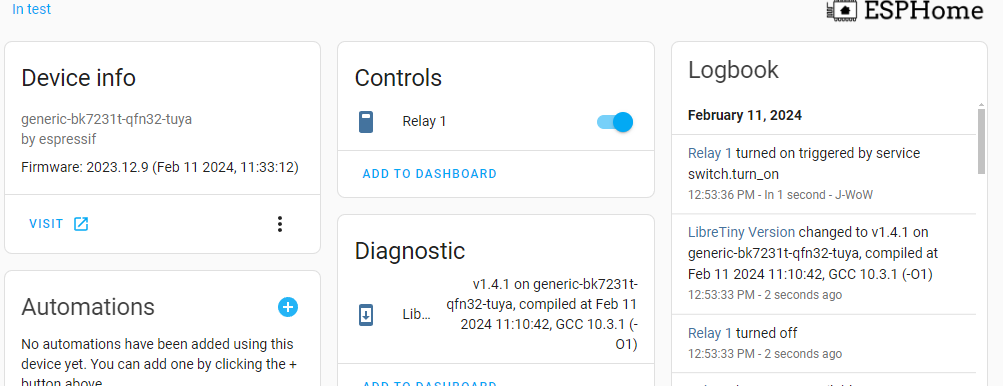
- Webserver view showing the same individual control of the relay and OTA upload option

Final Thoughts
- Was hoping this would work with Tuya Cloud-cutter instead of having to open and flash it manually. Another simple little smart plug integrated with Home Assistant.
- I will start looking at how to contribute firmware and profiles back to the repo so in the future others can have it working for this model.